|
|
|||||||||||||
 |
|
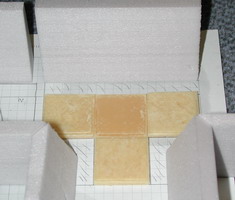
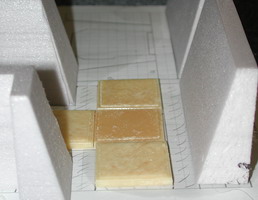
Since I prefer 3D-terrain instead of card-board, I was searching for a 3D-SpaceHulk for years. I found: But none of them I considered the perfect system. I want to have the same scale as the 1st Edition floor tiles (30mm) and I want to be able to build the original scenarios. So I started my third project: Building a 3D SpaceHulk Step 1: Floor TileFirst I created my own floor tile using the original dimensions of 30 x 30 mm. I used the same styrene sheet from Slaters Plastikard as for my bases (Double Tread 1:50).
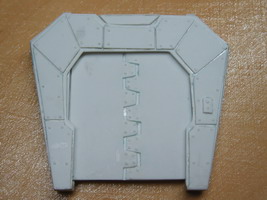
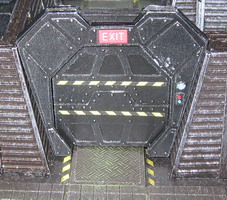
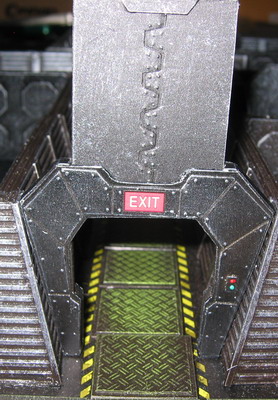
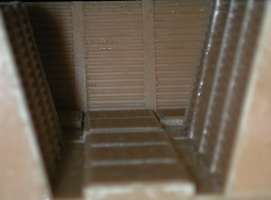
Step 2: The DoorI like the old door from Ainsty Tech Tunnel 2 and changed it to a closed bulkhead. The line Tech Tunnel was replaced by Tech Tunnel 4 and the door seemed to be OOP until Ainsty has been taken over by Old Crow Models. You find the door now here.
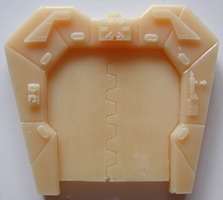
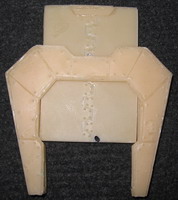
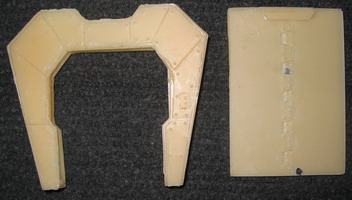
To avoid copyright issues with the recast, I built my own door with a removable bulkhead:
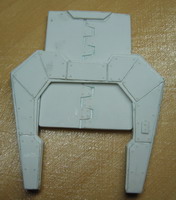
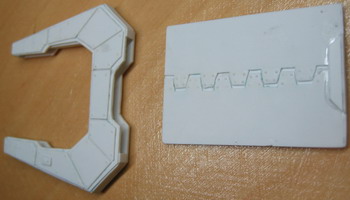
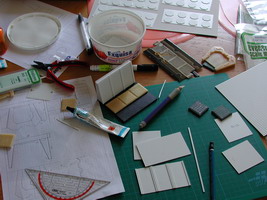
Step 3: Designing the WallsThis will be the most work. The first sketches are made and a lot of ideas in my head.
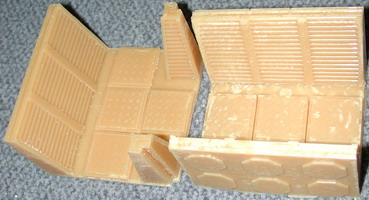
First I tried some tests with Styrofoam, but after I discovered styrene sheet I switched to this material. Its easy to handle and it has a smooth surface.
For the outside I used 1mm and 0,5 mm styrene sheet. For the inside I made some examples and decided to use Evergreen Scale Models Metal Siding Styrene Sheet No. 4530.
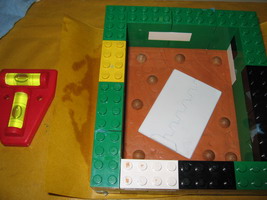
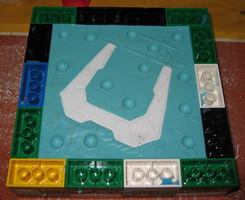
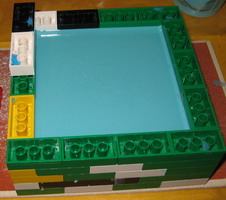
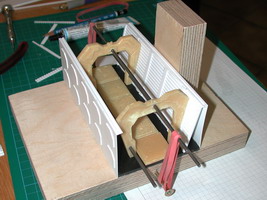
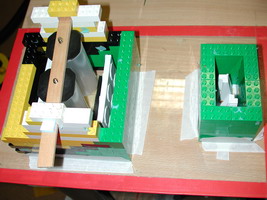
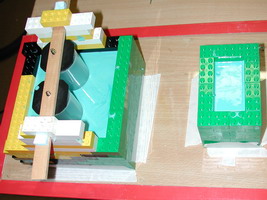
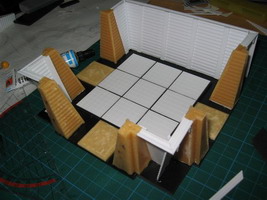
To get the right angle for the door I built a tool, which I used for all modules to glue the walls inside. Step 4: Moulding the prototypesTime to play the Lego!
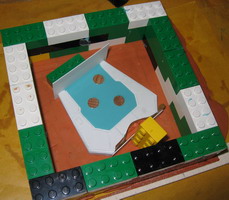
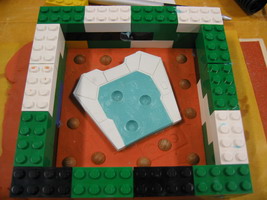
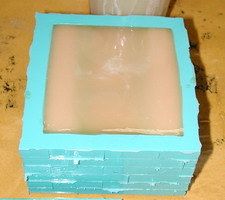
Now the first moulding. The 2 bottles save some silicon (Order No.: 03-001A) and make it easier to release later the casted module.
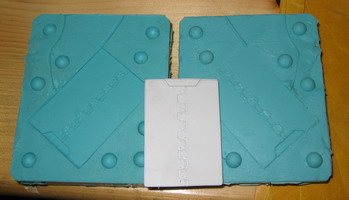
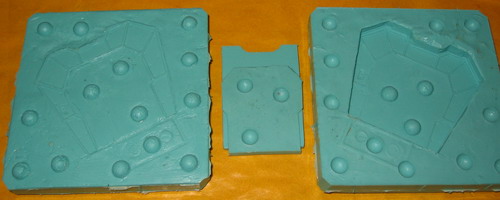
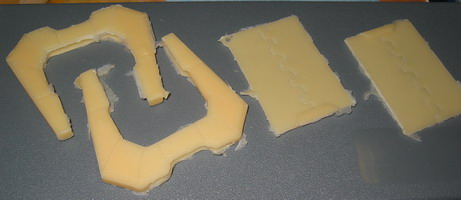
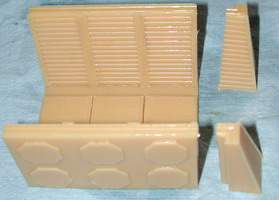
The first moulds are ready for casting. I was very happy that the prototype was not destroyed, while releasing from the mould. These casts are used to finish the other modules.
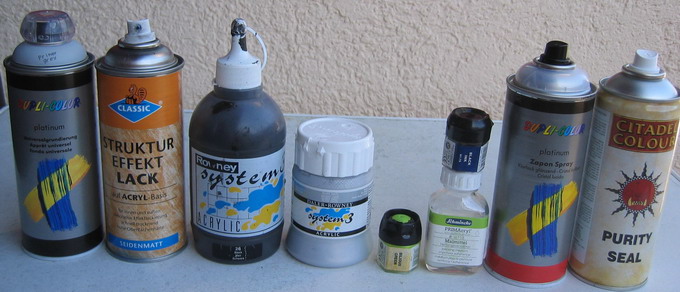
For casting I used resin from Rai-Ro (Order No.: 03-036A) which doesnt damage the silicon mould. [Edit] Because of some quality issues I moved to another resin from Alpina:
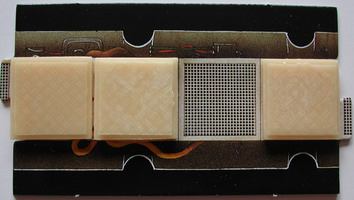
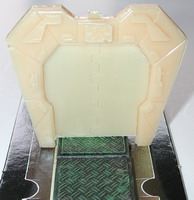
Step 5: The roomsFor the rooms I use for the 9 tiles in the center Evergreen Scale Models Sidewalk No. 4515.
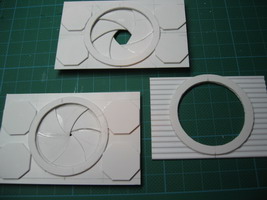
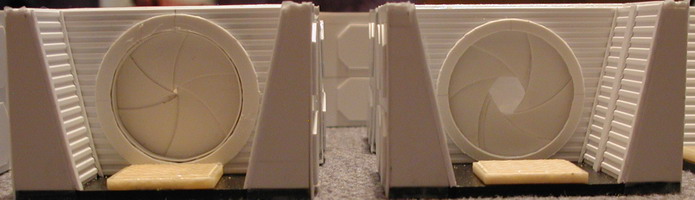
Step 6: End tilesThe 1st and 2nd Edition includes some end tiles. I decided to create some iris bulkheads for this.
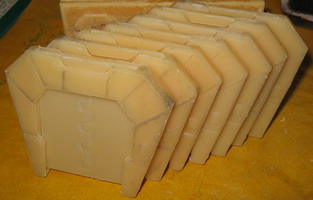
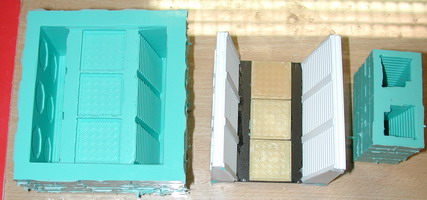
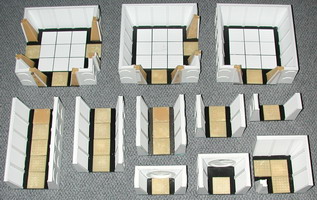
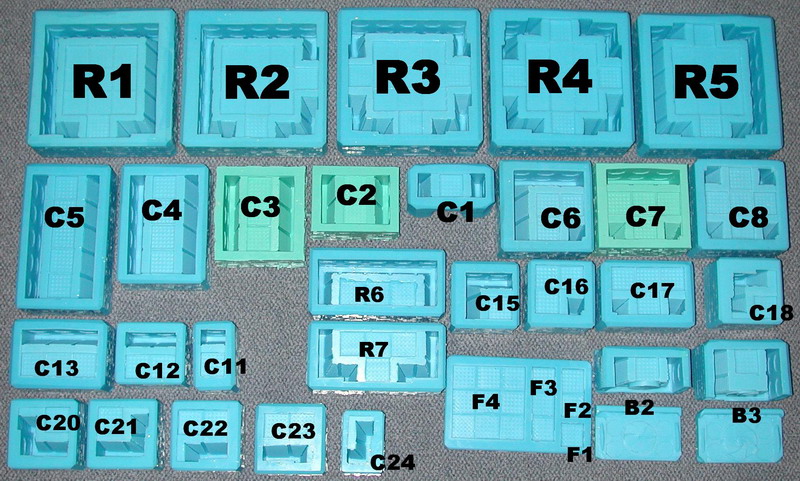
Step 7: All prototypes finishedHere you can see most of the core prototypes:
Step 8: Moulding the prototypesAnd here you can see the first moulds:
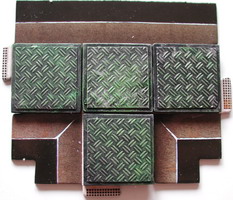
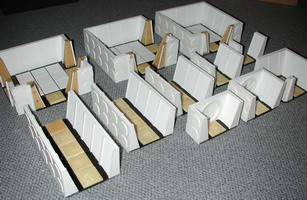
Corridor 2 tiles, corridor 3 tiles, corridor T and corridor X. For the X-corridor I tried a new silicon, which is cheaper, but has not the quality of the green one. It rips very easy, but it is good enough for this project. Its from Bethmann-Dental-Discount and has the order number 2014 (2kg), 2041 (6kg) and 2040 (12kg). And finally all moulds are finished:
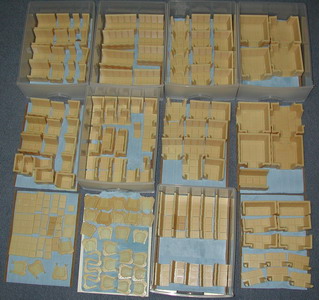
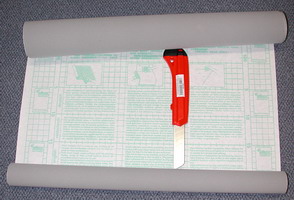
And here you can download the overview of all tiles needed for the missions: Download Step 9: Casting all tiles
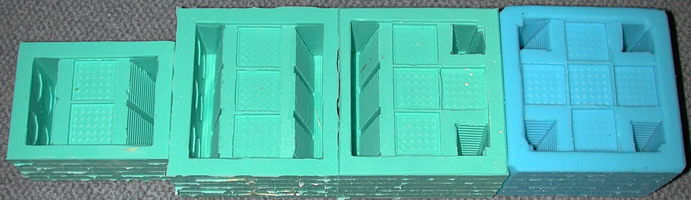
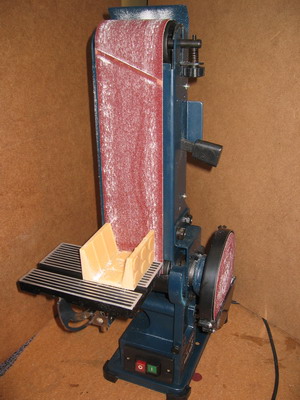
Step 10: Sanding and washing all casted tilesTo get the right 90 degree angle for the tiles I use an electronic sander.
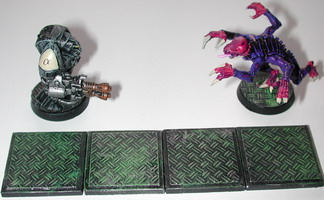
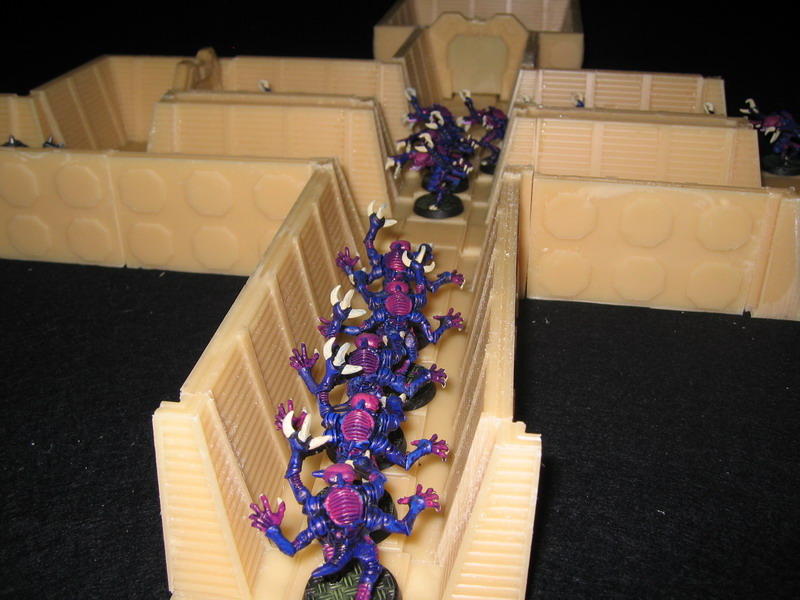
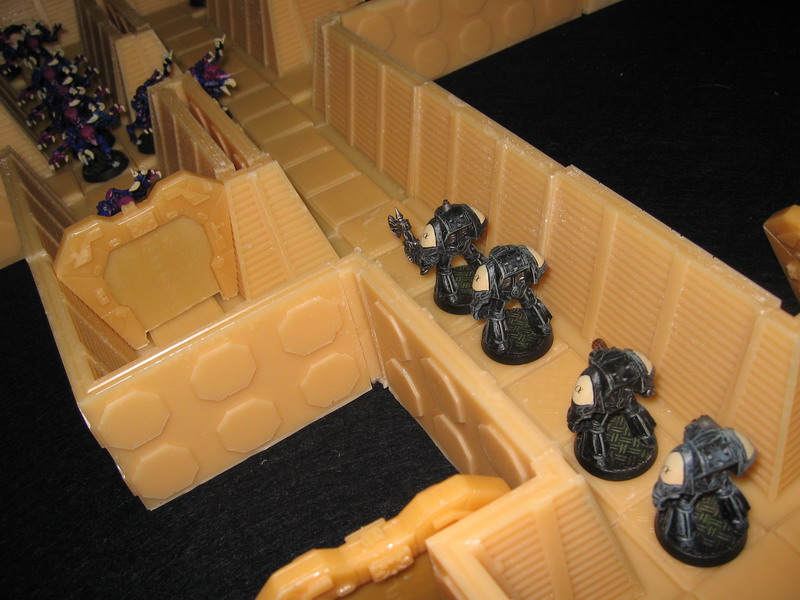
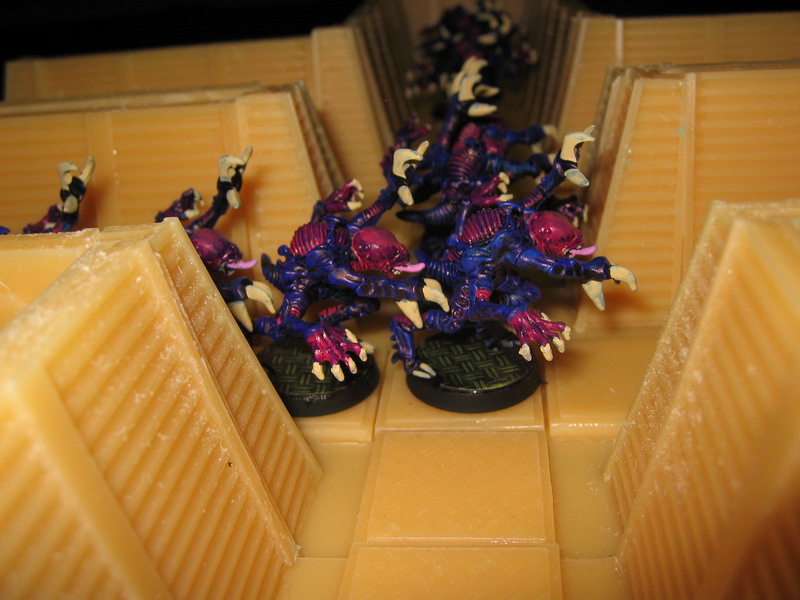
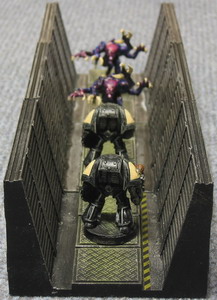
I cant wait longer - I have to make the first setup: Mission 1 (Click on the pics to get a 800x600 view)
Before priming it is useful to brush all tiles with water and a little bit dish-washing detergent.
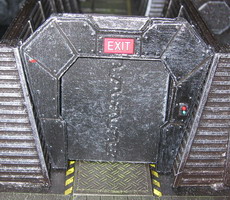
Step 11: PaintingI plan to use black primer spray from Games Workshop and simply to drybrush the tiles with Boltgun metall.
I made 3 tests:
I want to add a black/yellow line besides the floor tiles, using white laser water-slip decals. Here you see a test with clear water-slip decals and in reality its too dark. In the end I (and the SpaceHulk community) vote for the Left color scheme.
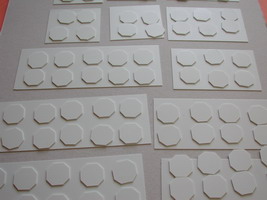
Step 12: FeltTo avoid moving the tiles while playing, each tile get a piece of felt underside. In Germany its called d-c-fix Velour Selbstklebefolie:
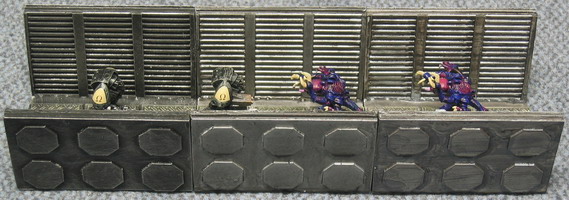
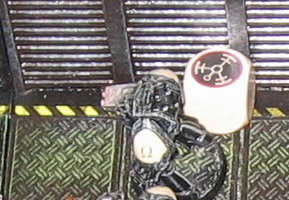
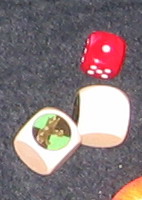
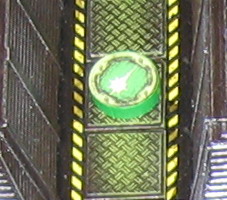
Step 13: Blips and CountersOf course a 3D-SpaceHulk needs special blips and counters. At the fair Spiel 2006 in Essen I bought several green wooden discs (25 x 6 mm, ProductNo P0003c) and white wooden blank dices (ProductNo W0016) from www.spielmaterial.de . Using clear and white laser water-slip decals very nice and useful blips and counters were made:
|


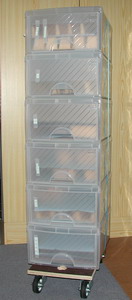 I need only 6 boxes for all tiles.


|
[Home] [Genestealer] [Terminators] [3D-SpaceHulk] [3D-Pimp my Hulk] [3D-Missions] [Events] [Links] [Disclaimer] [Contact] |